I received the Grace on Design River’s Edge decopauge paper curated by Llewellyn of Worn to Whimsy. I was excited to have the opportunity to work with this decopauge paper. Llewellyn is an amazing artist and I am honored to work with a decopauge paper with art that she created.
Bombay style chests are not wood but a composite material, in other words plastic. This particular chest was spray painted this lovely orange. It had paint drips and was cracking and peeling all over.
- First I cleaned it very well with a tsp based cleaner. When using a tsp based cleaner, or most cleaners you must also rinse very well with water.
- Next I spent some time sanding as much of the drips off as I possibly could. I was unable to get all of them off without tons of work so I decided I would go with plan B. I will explain that in a bit.
- After I sanded it I wiped it down very well. Because this is a slick surface I needed to apply a bonding primer. On this one I used Zinsser Bondz Maximum Adhesion Primer. This helps with paint adhesion.
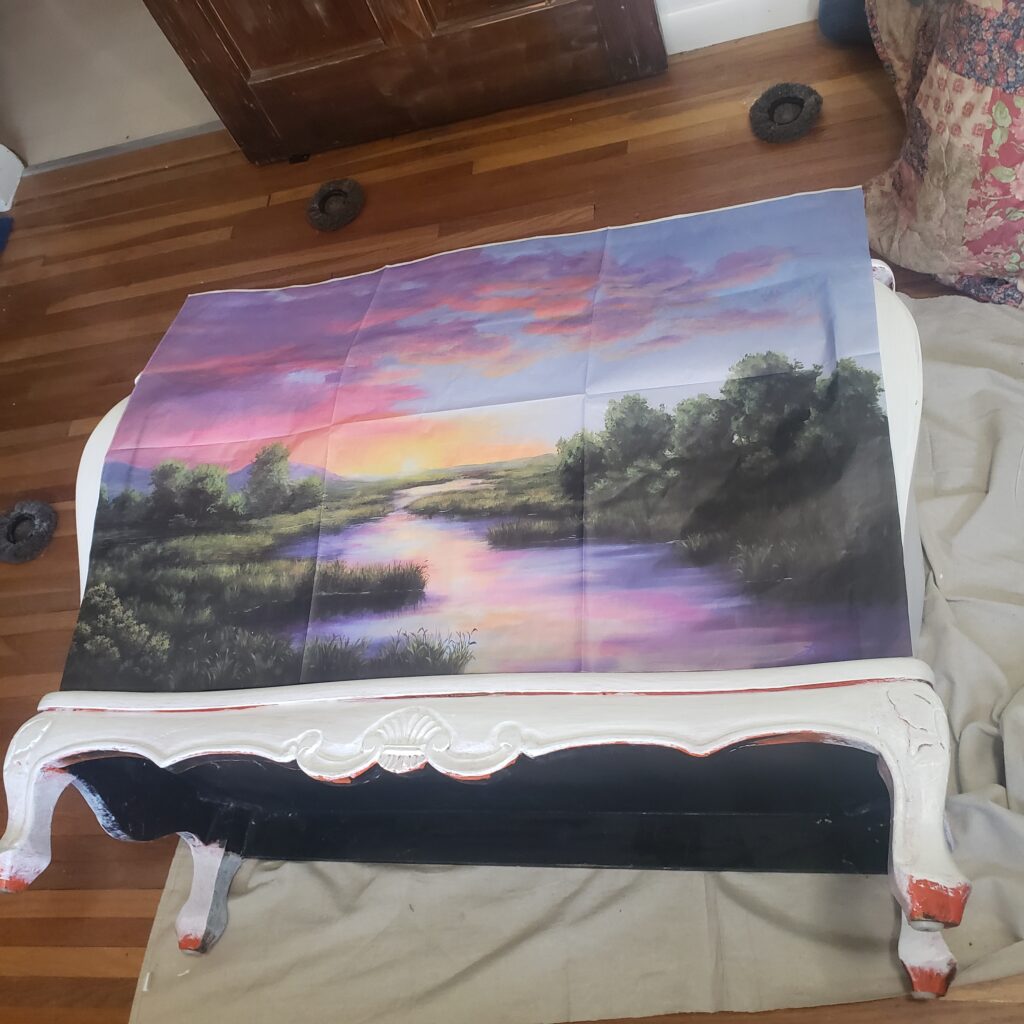
Now the fun part starts. It was time to apply the decopauge paper on the front of this chest. I have to be honest. This was very challenging with all those curves. And the decopauge print is large as it covers the entire front of this chest.
I decided to start from the bottom up because if I were to lose any of the paper I prefer it to be the sky and not the bottom of the paper.
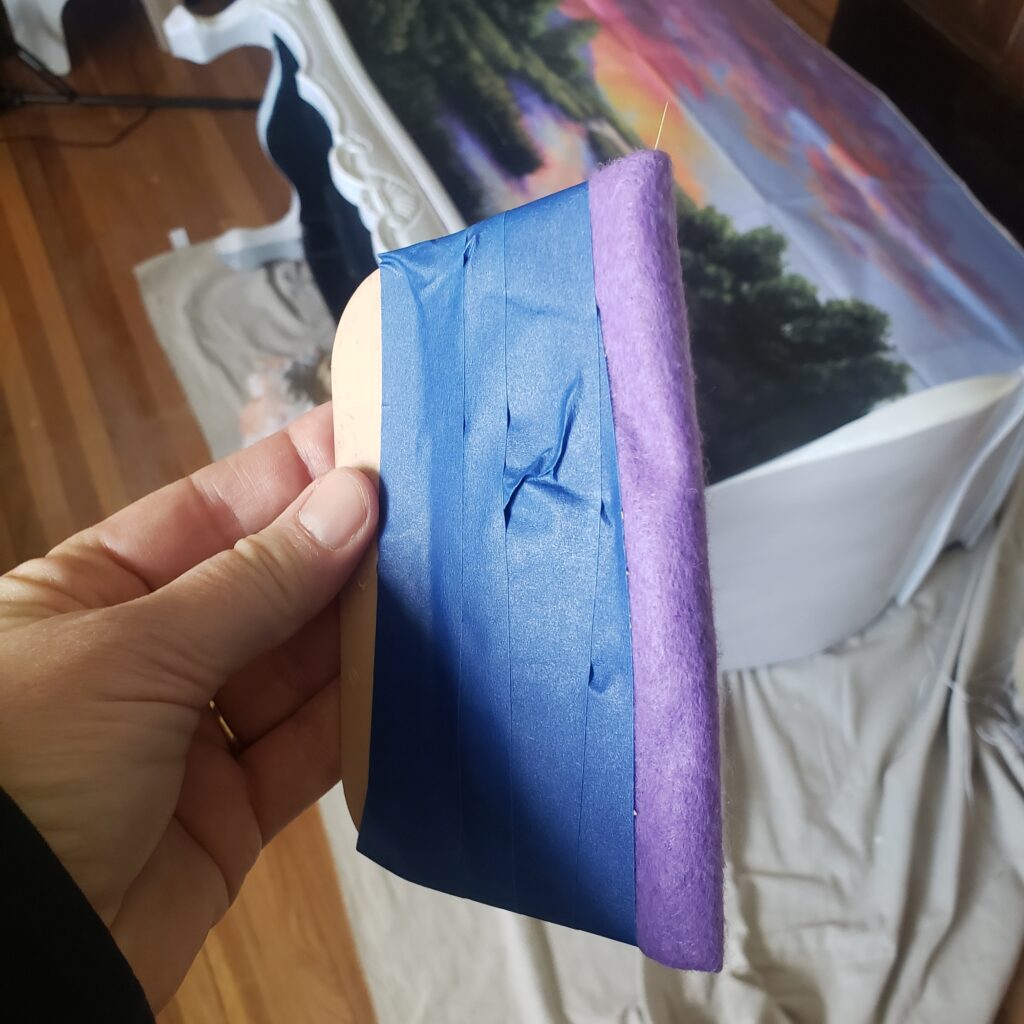
I made my own tool for applying the paper only because I did not have the proper tool on hand. Grace on Design sold those tools but I am sure you can find them wherever decopauge paper is sold.
To apply the paper I used General Finishes High performance top coat by brushing it on the dresser, laying the paper down and using the homemade tool to smooth out the paper. I did get wrinkles in the paper but I knew that I could fix these by ironing those out. I will get into that process shortly.
Here the paper is applied to 2 drawers. I cut the paper between the drawers with an exacto knife. You want to knife to be as sharp as possible to cut the paper without ripping it. This process would have worked better if I had let the paper dry first.
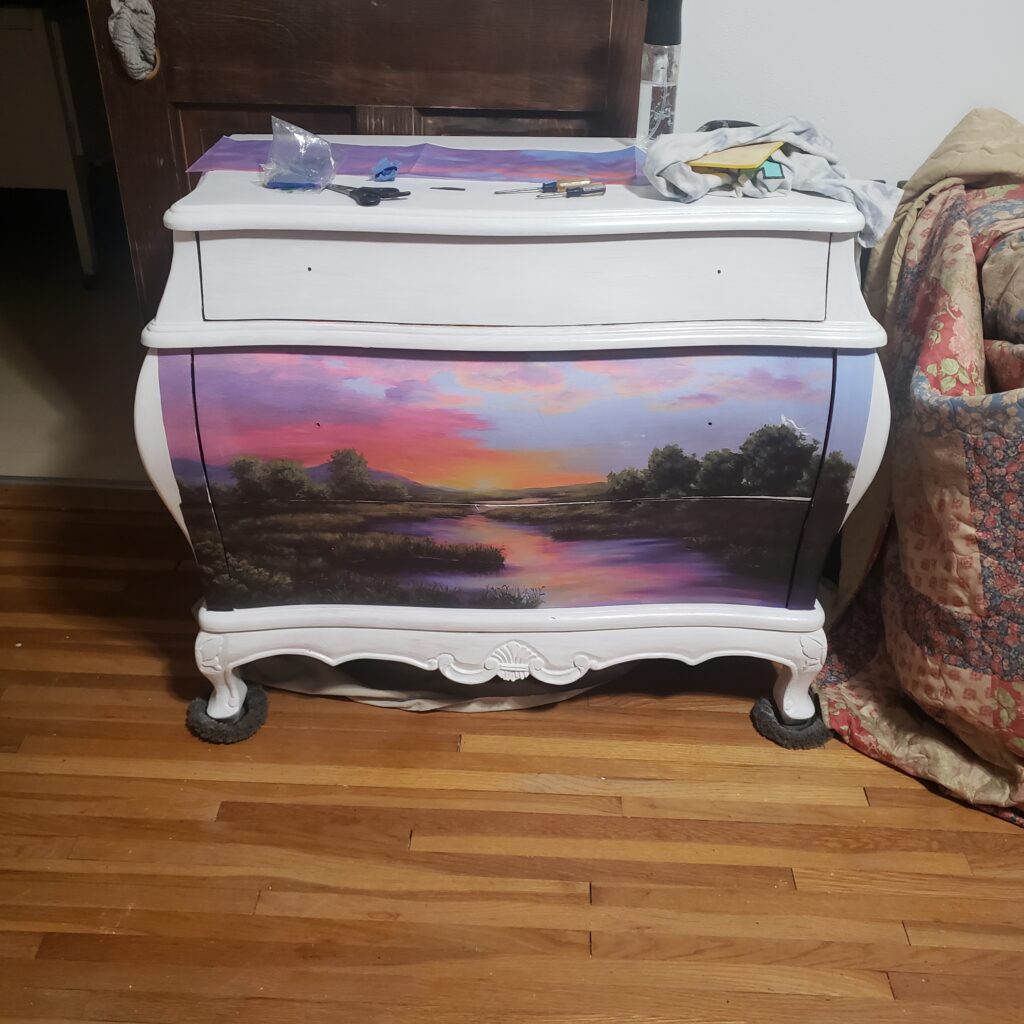
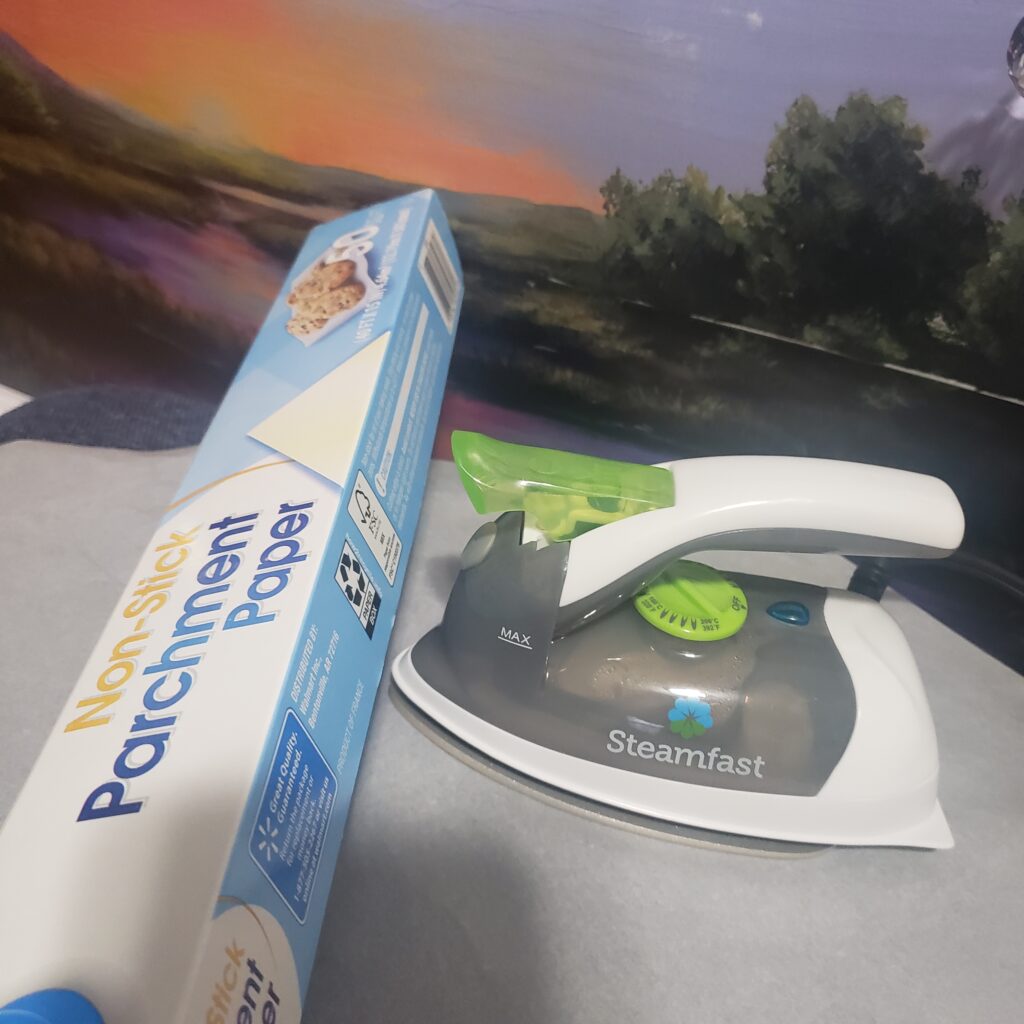
Now I pulled out the iron. I had more wrinkles than most applications because of the curves on this chest. I have a small craft iron and use this on high heat with no water. You don’t want to get the paper wet or you will rip it. You also want to use parchment paper and not apply the iron directly on the decopauge paper.
I was unable to get every single wrinkle of out the paper but got most of them. I attribute most of these wrinkles to user error and also the fact that the chest is very curvy.
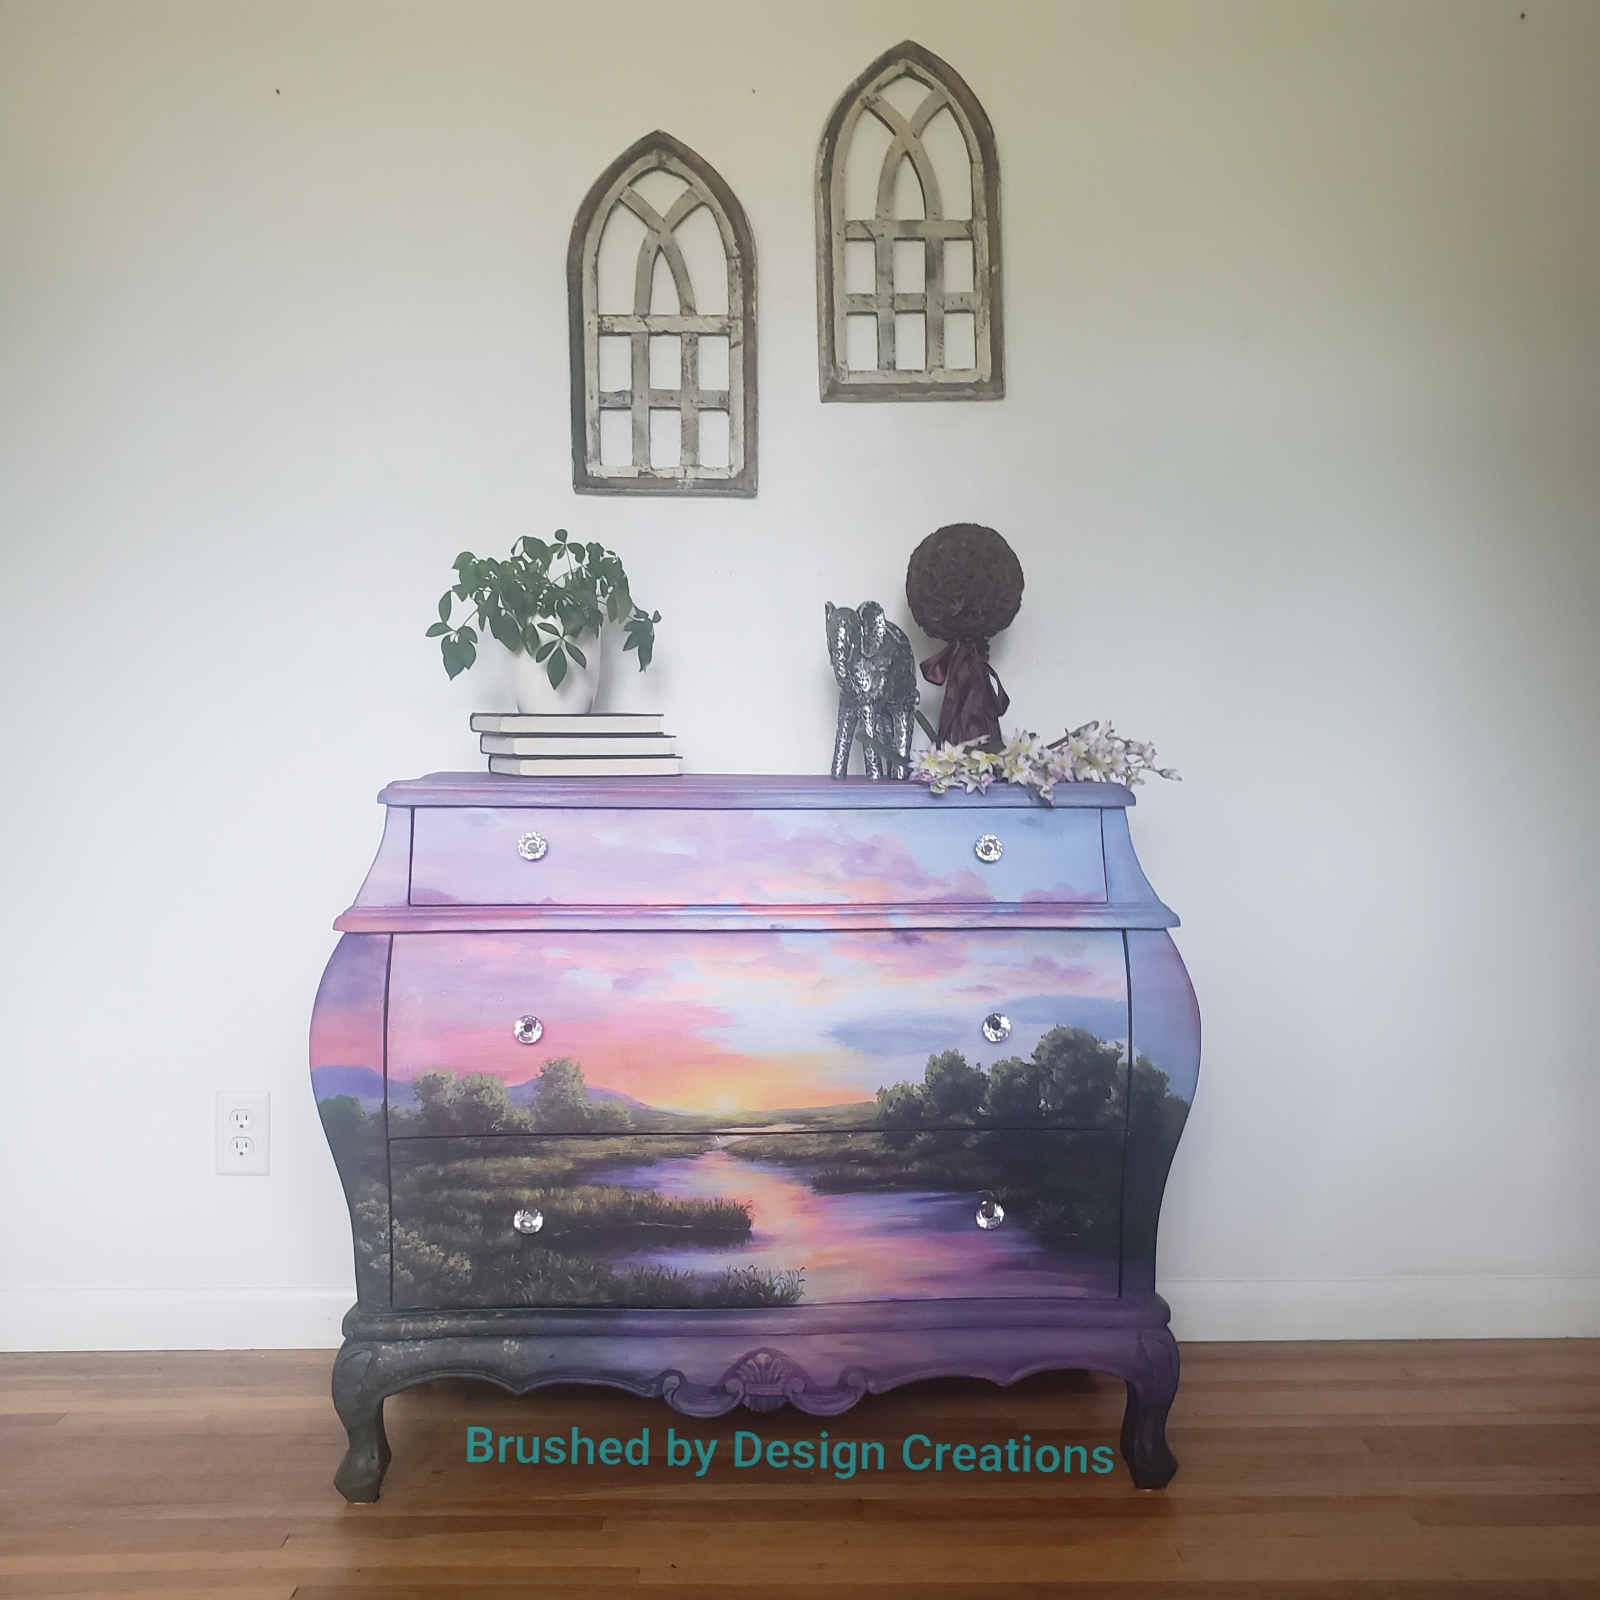
The last thing I needed to do was to blend in the paper. This is where my art came into play. Remember those drips I talked about? Well I decided that the sides would have texture applied by using Dixie Belle seaspray to the paint. I used this texture on the sides only and not the top.
For the top I decided to add dimension through painting on several colors paint. Painting of the sides and the bottom of the front took a few attempts as I tried to match the colors used on the decopauge paper.
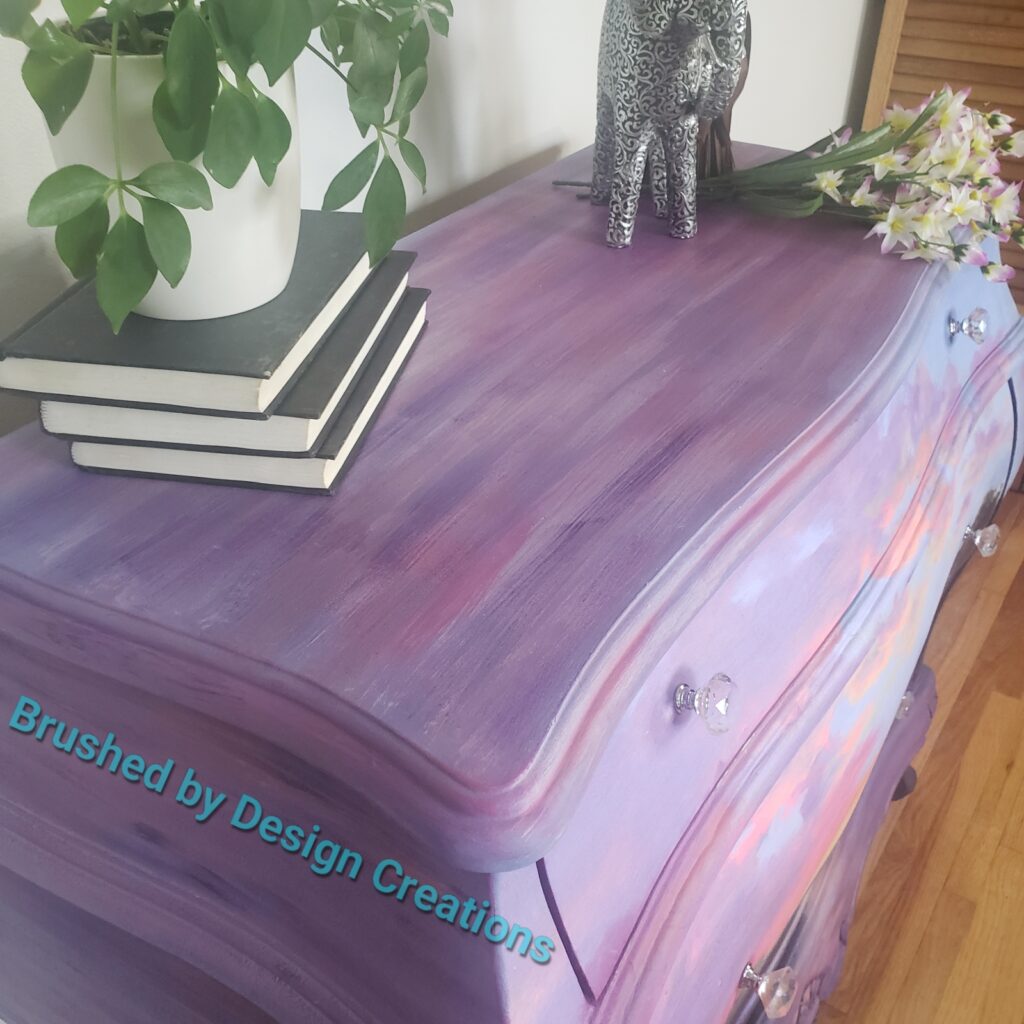
I was finally able to blend the paper on the sides, the bottom and wrap the scene around the sides of the dresser in a way that I was happy with. The final step was to top coat the entire piece. I used General Finishes High Performance top coat in Satin.